Your website, online
Three short sessions, about 45 minutes in total. Do them all today, or one at a time: we email you each step a few days apart after you buy.
- 1Export and uploadAbout 20 minutes · day 1
- 2Connect your emailAbout 15 minutes · day 3
- 3Check everythingAbout 10 minutes · day 7
- +Changes and safetyFor later · day 14
- Hosting that runs PHP 7.4 or newer (Hostinger, SiteGround, Bluehost and almost every other host do).
- Your domain pointed at that hosting.
- Your hosting login. You'll use its File Manager, right in the browser.
Export and upload
About 20 minutesThis puts your site online.
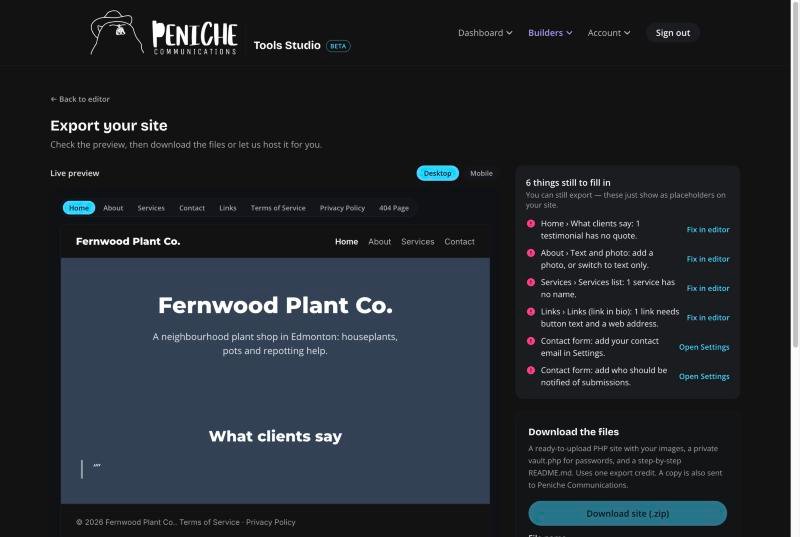
- In Tools Studio, open your site in the Website Builder and go to Export.
- Fix anything in the “things still to fill in” box (or export anyway; they show as placeholders).
- Tick the box confirming the content is yours, then press Download site (.zip).
- Unzip the file on your computer.
Inside the zip you'll find three things. Each one goes to a different place:
- In your hosting, open File Manager and find your domain's public_html folder (sometimes www or htdocs). On Hostinger: Websites → your site → File Manager.
- Open the public_html folder inside your zip, select everything in it, and upload it into your hosting's public_html. Keep the folders as they are.
- Go up one level and upload vault.php there.
- If your host left a placeholder page (index.html or default.php), delete it.
- Visit your domain.
Connect your email
About 15 minutesYour Contact form works straight away using your host's basic mail, but those messages often land in spam. A mailbox on your own domain fixes that.
- At your host, create an email account on your domain, for example hello@yourbusiness.ca. Keep its password in a password manager.
- Find its outgoing mail (SMTP) details (see the table).
- In File Manager, right-click vault.php → Edit, and fill in the Email sending section. Save.
- In public_html/config.php, set MAIL_FROM to the same address if it isn't already.
- Send yourself a message through your Contact form.
| Setting in vault.php | Hostinger | Other hosts |
|---|---|---|
SMTP_HOST | smtp.hostinger.com | Look under “Email → Connect devices” or “Mail client settings” |
SMTP_PORT | 465 | |
SMTP_SECURE | ssl | |
SMTP_USER | The full email address | |
SMTP_PASS | That mailbox's password | |
Check everything
About 10 minutesSix checks on your live site before you tell anyone.
- Every page opens from the menu.
- Your logo and images show.
- The Contact form sends, and the email arrives.
- It looks right on your phone.
- The Terms of Service and Privacy Policy open. They're a starting template: have a lawyer review them before you rely on them.
- Your address bar shows a padlock (https). If not, turn on the free SSL certificate in your hosting settings.
Changes and safety
For laterChanging text or photos
- Open Page Editor in Tools Studio.
- Upload your site's zip and make the change.
- Export, then upload the new public_html contents over the old ones.
- Leave vault.php where it is.
Don't edit pages by hand
If you plan to use Page Editor, edit there. Hand edits are overwritten the next time you upload an export.
Keep it safe
- Keep the latest zip in a safe place (a cloud drive is fine).
- Use a strong, unique hosting password and turn on two-step login.
- Never share vault.php. If it leaks, change the passwords in it.
If something's not right
Blank page or “500 error”
“Page not found” on every page except the home page
The Contact form says it couldn't send
Messages land in spam
Images are missing
Rather not do this part?
Peniche Communications sets these sites up every day. Send us your domain and what you're seeing, or ask about hosting where we do all of it for you.
Get helpPeniche Communications · Edmonton, Alberta · Back to top